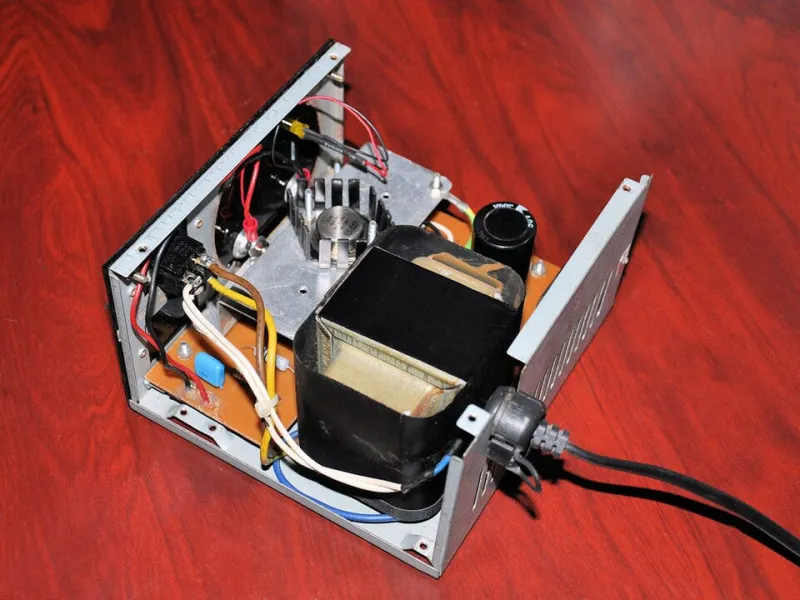
Capacitors Are Cheap — Until They're Not: What's Really Inside That Bargain Power Supply

Photo by Photo by Blaz Erzetic on Unsplash on Unsplash
Here's a scenario every maker has lived through at least once. You grab a cheap wall adapter from a drawer, wire it up to your latest project, and everything seems fine — until a few weeks later something smells funny, the board starts acting weird, or the supply just dies outright. You swap in a name-brand unit and suddenly the whole thing runs like a dream.
So what changed? The voltage is the same. The current rating is roughly the same. The plug fits. But the behavior is completely different.
Nine times out of ten, the answer is capacitors — specifically, what kind they used, how many, and whether they were even rated for the job in the first place.
Why Capacitors Matter More Than You Think
In a switching power supply (which is what basically every wall adapter made after 1995 is), capacitors do a lot of heavy lifting. On the input side, they smooth out the rectified AC voltage before it hits the switching stage. On the output side, they filter the high-frequency switching noise so your load sees something that actually resembles clean DC.
When those capacitors are undersized, low-grade, or just plain fake, the output voltage isn't the flat line it's supposed to be. Instead you get ripple — a rapid up-and-down oscillation riding on top of your supply voltage. Some ripple is always present and totally normal. A lot of ripple is a problem. Catastrophic ripple is how you fry a microcontroller that was otherwise perfectly happy.
What the Oscilloscope Actually Shows
We pulled four power supplies off the shelf — two dirt-cheap no-name 5V/2A adapters from the usual online marketplaces (both under $3 shipped), one mid-tier unit from a recognizable brand at around $12, and one from a well-regarded industrial supplier at $35.
All four were loaded to 1.5A and probed at the output terminals with a 100MHz oscilloscope. Here's roughly what we saw:
No-name Unit A: Peak-to-peak ripple of around 280mV at 100kHz switching frequency, with occasional spikes pushing past 400mV. The output voltage also sagged noticeably under load — we measured 4.71V instead of the rated 5V.
No-name Unit B: Slightly better at around 190mV peak-to-peak, but with an ugly low-frequency component that suggested the input filter caps were struggling. Voltage regulation was marginally better at 4.83V.
Mid-tier branded unit: Ripple dropped to around 60mV peak-to-peak. Clean switching waveform, no major spikes. Output sat at 4.97V under the same 1.5A load.
Industrial-grade unit: About 25mV peak-to-peak. Essentially textbook-clean. Output was 5.01V.
For reference, most microcontrollers and single-board computers want to see ripple under 50mV for reliable operation. Some are more tolerant, some are less — but 280mV is genuinely bad, and it explains a lot of mysterious reboot loops and corrupted SD cards.
Cracking Them Open: The Capacitor Hall of Shame
We disassembled all four units (carefully — there are lethal voltages in here even when unplugged, so let them discharge fully before you go poking around). The difference was immediately visible.
Both no-name units used electrolytic capacitors with unfamiliar brand markings — the kind of generic labeling that often indicates either counterfeit components or extremely low-tier manufacturing. More telling: the capacitors were rated for 85°C operation. Inside a switching supply under load, temperatures routinely hit 70–75°C. That leaves almost no thermal headroom, and electrolytic capacitors have a well-documented exponential relationship between temperature and lifespan. Run them hot for long enough and they dry out, lose capacitance, and eventually fail — sometimes spectacularly.
The mid-tier unit used 105°C-rated caps from a recognizable manufacturer. The industrial unit went a step further with solid polymer capacitors on the output stage, which have dramatically lower ESR (equivalent series resistance) and essentially don't dry out the way traditional electrolytics do.
The output capacitance values told a similar story. The cheap units used smaller capacitors than their ratings would suggest was wise. The premium units were conservatively specced.
How to Spot a Sketchy Capacitor Before You Buy
If you're evaluating a supply before purchase and can open it up (or find a teardown online), here's what to look for:
Temperature rating: 105°C is the minimum you want to see in a power supply application. 85°C caps in a supply are a red flag.
Brand markings: Nichicon, Rubycon, Panasonic, United Chemi-Con, and Würth are all solid. Completely unbranded caps, or brands you can't find any information on, warrant suspicion.
Capacitance vs. voltage rating: Cheap designs often use capacitors that are technically within spec but with almost no margin. A 10V-rated cap on a 5V rail sounds fine until you factor in voltage spikes during load transients.
Physical condition: Bulging tops on electrolytic caps are a classic sign of failure or near-failure. If you're buying secondhand or refurbished, look closely.
Solid polymer vs. electrolytic: On the output stage especially, solid polymer caps are a meaningful upgrade. Some budget supplies actually use them — and those tend to perform noticeably better.
Budget Supplies That Actually Do It Right
Here's the thing: not every cheap supply is a disaster waiting to happen. A handful of lower-cost options — particularly from brands like Meanwell's entry-level line, certain CUI devices, and some of the better-regarded Aliexpress brands with documented teardowns — actually use quality capacitors and don't cut corners on filtering.
The trick is doing your homework before you buy. Search for teardowns on YouTube or forums like EEVblog. If someone has already cracked open the exact model you're considering, you'll know within five minutes whether the caps are worth trusting.
For projects where stability really matters — anything running an ESP32, a Raspberry Pi, or sensitive sensors — we'd generally recommend spending the extra $8–10 for a supply that's been vetted. For lower-stakes applications like powering LEDs or basic relay circuits, a budget supply with decent ripple specs is usually fine.
The Fix If You're Already Stuck With a Cheap Supply
If you've got a sketchy supply and you're not ready to replace it, there's a practical workaround: add filtering at the load. A 470µF or 1000µF low-ESR electrolytic cap in parallel with a 0.1µF ceramic cap, placed right at the power input pins of your board, will absorb a lot of the ripple before it causes problems. It won't fix a truly terrible supply, but it can make a marginal one usable.
You can also add a small LC filter on the output line — a ferrite bead or small inductor followed by a capacitor to ground. This is actually what a lot of well-designed PCBs already include, which is part of why some boards tolerate noisy supplies better than others.
Bottom Line
The gap between a $2 supply and a $20 supply isn't really about the transformer or the switching IC. It's mostly about the capacitors — how many, what grade, and whether anyone bothered to design the filter stage properly. That's where the reliability lives, and that's where budget manufacturers consistently cut corners to shave a few cents off the BOM.
Knowing what to look for puts you ahead of the game. And when you find a budget supply that actually uses quality components? That's the sweet spot Cheap5V was built around — because affordable and reliable aren't mutually exclusive. You just have to know where to look.